photo meetme.png

Nov 21, 2013

GIY: get washified! ^____^


Hi!,

                    School has finally started. busy mode: ON. I was not able to go online for a long time because i had my schedule fixed and of course i also needed to report on my class. Anyhow, yesterday after class i was so bored, i can't sleep because of all the caffeine circulating allover my body, so i decided to do something that would feed my hunger of boredom. As you guys can see i washified almost all of my makeup! And i can't help myself not to share it to you guys! And since it has been ages,  ever since i shared my last DIY, i pushed myself to make this post, I pretty hope you guys will like it ;) Let's go?!

Nov 10, 2013

HOW TO: cross process picture using adobe photoshop ^^

Hi everyone!

               Are you one of those girls who likes adding filters or effects on your photos? Well, me? yes!, I am one of those girls.I sometimes add effects on some of my pictures that i share on facebook, often times in pictures I put as my display picture. I add effects to the photo so the resolution would sum up a bit and also it's fun and eye-catching! :)
               
              Nowadays, there's so many apps where you can add effects by just tapping your phone's screen and there are so many effects to choose from, like the famous camera 360 app. But, before all of those was ever created, there's this process which you can simply do in adobe photoshop. This post will show you how to acheive the filter effect without the use of android phones or the internet. just your plain computer and yourself and of course adobe photoshop :D

              the filter effect that we will be doing is called "cross process" if i am not mistaken ^______^V...
so without further ado, let me show you guys the phases to attain the said effect ^_______^

(sample picture with the effect)

Oct 4, 2013

DIY: how to make a simple box with lid :)

Hi All!

              A repost from my tumblr blog ^_____________^ I remembered I haven't posted it here hihi and since I don't have any new diy for you guys, I hope this old diy of mine will still give you inspiration


               So, I happen to realize that my old storage for my nail polish can't store all my nail polish anymore, because I am trying a lot of nail polish brands and colors lately, so my dilemma is I needed a bigger storage, and since i have lots of cardboard stored in my room...why not make myself a box?! and as for my remedy, I made a box that has a lid--I know you've seen gazillion of tutorial these but, I am going to share you guys how I did mine ^___^....  


Aug 22, 2013

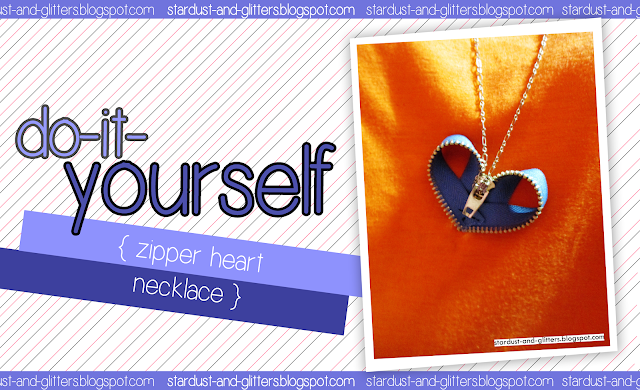
DIY: zipper heart pendant/necklace ^^

Hi All,

              Welcome back to my almost outdated blog :((((      I am very busy at school that is why i neglect updating this blog. Anyhow, I am back! ^____^ and i am going to share you guys a DIY, I got time do so last Thursday because of the holiday, this idea was inspired by one of the things that you can do to a broken zipper which i got on pinterest. And this one is what attracted me most......So, without further ado, I'll show you guys how to make them :))


Apr 5, 2013

DIY: peek-a-boo shirt ;)


~ Hi! :))

                I hope everyone’s April is off to a good start. I know mine is! Well, if you'd ask me, today was very productive. I watched: How to lose a guy in 10 days, The parent trap, While you were sleeping and The wedding planner all by myself, I laughed and cried alone Lol, annnnd I finally decided to do my laundry today, but unfortunately I did not finish because of the heavy rain--will continue tomorrow I promise....:DD                 
                 Another productive thing I did today was this DIY that I am going to share with you guys. This is famous by the call of peek-a-boo shirt/top. I believe this was already famous back in the 80's, and then it's back on the trend again......So for the wrap, I was looking for a top like so but unluckily all I found was for the rich kids to have. I won't go heave a large amount of money in a single shirt, and I think a lot of you guys also (especially us, tipid human beings). That's why I ended up making my own peek-a-boo shirt. I've watched a video tutorial on youtube and I am also going to share you guys how I did mine :))


Jan 19, 2013

~ transformer#1


~ Hi ALL! :D

                     It's been awhile, so how is everybody? :) missed this. whew! .I'm doing some home works earlier and did some research for my thesis and research papers but, i got so fed up and stopped for a moment and look, i found myself blogging. Though I am almost out of words to type and ideas to express on my school works but, here I am posting, and i kind of find that weird haha, just like what they say, you cannot escape from what you really like doing. So, for the wrap, I want to share to you people what I've done a long long time ago, and just thought of posting it now.

                   So, remember the last time i packed some old stuffs for donation?. I went and checked everyone's closet and looked for some of their unused items, which i got sooo many! :D after going to my mom's, my sister-in-law's, my brother's and my closet i finally went to my sister's cabinet *evil grin*, maybe some of you know my sister but, for those who don't, let me just cut it short--i have a sister who really is so conscious about her look, she really have cabinets full of her clothes, so yeah i went there and one-by-one I need to ask her if she's still going to use these and that, maybe i only got a few on her closet. She's way too koripot when it comes to giving away her stuffs T_T

Jan 5, 2013

~ DIY organizer shaped-shoe :))


~ Hi All! :))

                  Happy 2O13 everyone!. So this is my very first post for this year weeeeeeeeee!, I'm feeling okay now, buti na lang at hindi dengue yung dumapo sakin .*Thank God*. My brain is not yet fully responding so i won't be blabbing more this time, bare with me, please? :(

                 What I did today was an organizer-shaped-shoe .I saw this one on tumblr and made one myself, but mine has this vintage touch, or should i say kikay touch? LOL *u*


here's the finished design!. I stashed in some of my things already :D
sorry for the low reso, i only used my phone to capture everything.

Dec 20, 2012

RE-POST: DIY: bow clips

~ Hi Everyone! :))

                       So, it's 12-21-12. Lots of people on the net kept on talking about "the end of the world" but,

(photo from 9gag)

HAHAHA, natawa lang talaga ako dito sorry po... ^__^V 
and you know what? My world would end if I'd not update this blog, hihi .

So, I am going to post one of the things my draft's been holding for quite a time now.
 It isn't utterly a "NEW" DIY. Nonetheless, I still want to share it to you guys...PLEASE? :)) 
Maybe you've already seen hundreds of tutorials on making a bow and maybe this is the 101st on your list and now that I'm not making any sense, let's just proceed to the step-by-step :D

Nov 10, 2012

~ bubble hair (my version)


~ Hi Everyone! ;)


               Whenever i got nothing to do, i play with my hair. (counting them when im bored, SRSLY!) and trying so many different hairstyles. When I was a kid, I dream to have a very long long hair like rapunzel (did i spell that right?) and now that im big, im living my dream :)) Im growing my hair loong now, I want my hair to grow up to my hips, i started not to trim my hair last june, that'll be my last affair with sheers, hopefully next year i could achieve my desired legnth--nevertheless, here's one of the things i did the other day--another hairstyle (naisipan ko lang i-capture sarili ko while doing it). This is a simple, very easy and a very cute hairsty

             --here's me, doing the bubble hairsyle (i called it "bubble hair" because i do not know what it's called LOL)
~ sit back, and enjoy watching! :DDD


(sorry for the very low reso, i forgot to save it on HD, 
not really HD but, the pixels are  a bit higher--than this ^_^V)


Oct 25, 2012

bun bun bun bun


~ whew this is a repost: i accidentally deleted my post about doughnut bun :/
i'm such a cluts!

(image from tumblr)

Oct 17, 2012

how to make a doughnut bun using a sock


(image from google)

~ my apologies, i just noticed that the video i queued was corrupted. so (eto re-post! haha) here's my video tutorial on making a doughnut/donut scrunchy/bun. i mean this is my version on making a doughnut scrunchy or bun haha, so i hope you'll like it, and yeah feel free to comment and suggest anytime! ;)

Oct 10, 2012

hairstyles that are quick and easy


these are some hairstyles that I think are appropriate for school! They take no more than 5 - 10 minutes and some require little to no heat. The first section is just different braided hairstyles. The second section is mainly for long hair and the third section is mainly for short hair. Of course, you can do whatever you want! I didn’t know how to categorize all of these so they’re a bit random. With all of these hairstyles you can add clips, headbands, accessories! Customize them to bring out your personality and your own.
1. Braids
  • Braids inside a braid: Seperate your hair into 3 sections as if you were about to do a traditional braid. Take one of those sections and braid it and secure with an elastic. Then take the other two sections and braid with the braided section. When you get to the bottom, take the elastic out of the braided section and use it to tie the whole thing together. Then tug at the braid to widen it. This technique will add body and make your braid look thicker. And that’s it! It looks like a 4 strand braid sometimes!
  • Messy effortless braid: Tease your crown by hair spraying then back combing it. Smooth it out then begin to french braid your entire head, but stop when there’s an inch or two left. Then take a few strands out and tease the ends of it. You can loosely curl it if you want it to look a bit messier.
  • Half up, half down braid: Braid two small sections of hair that are near your forehead/temples. Braid all the way down then secure with an elastic. Then bring those two braids back and carefully take the small elastics out. Then using another elastic, tie them both together.
  • Braided headband: Take a section of hair above or behind your hair that is fairly long. Comb it out and up to make sure there are no tangles. Then begin braiding. To make it easier to form it into a headband, braid up. Once you’re finished braiding, bring it over your head and to your other ear. You can either tie it with a small elastic then bobby pin it, or just pin it. Make sure your braid is hidden by your other hair! You can also bobby pin the braid on top into place.
  • Braided bun: Gather your hair up into a high ponytail (or side, or low, doesn’t really matter) then secure with a small elastic. Then separate the ponytail into two sections and braid them. Secure each side with a small elastic. Then start wrapping it around the core of the ponytail to create a bun! Because you’re doing it in two sections, it’ll be thicker. Bobby pin the bun into place.
  • Braided bangs: Grab your bangs and separate them into 3 sections. Then begin french braiding. When you’re finished, hide the hair behind your ear and secure it with an elastic and bobby pin it in place. Tug at the braid to add volume, body, and thickness.

Sep 1, 2012

DIY: t-shirt transformation

~ Hi

              Another DIY for you guys, first time to try transform-your-t-shirt. I honestly do not now what they call this, I saw this on tumblr and tried it on one of my old t-shirt and here's what I managed to come up with. So as usual, I am going to show you guys I made mide :))


Back To Top Transparent Sexy Pink Heart